How To Clean Rv Rubber Roof | Full Guide
Cleaning an rv rubber roof is an excellent way to keep the roof in good condition and protect it from future damage such as cracking, peeling or rotting. It is an essential part of keeping your rv in good condition for a long time to come.
An rv rubber roof should be cleaned with a soft, clean cloth and warm water. It is important that you do not use soap or harsh chemicals on your rubber roof because these can harm it or cause discoloration in the future.
It's best to wash it when it is in direct sunlight so that the heat can help open up any cracks and remove dirt deeper into the surface than would otherwise happen in the shade. Be sure to rinse off all traces of soap with lots of fresh water before allowing it to dry thoroughly in direct sunlight so there are no streaks left behind.
The commercial cleaners available at many stores these days will work just as well as homemade solutions but they cost more money. Choose the right chemicals for the job as the wrong will can likely damage the rubber.
Cleaners that are too harmful may even eat through into the foam core of the roof, causing it to disintegrate over time.
Rv Rubber Roof Cleaning Tips
Using a solution made from three parts dish soap and one part water is an effective way of cleaning most RV roofs. This can dissolve dirt and grime on both light and dark surfaces without marring them with streaking or other marks that come with using harsher chemicals. The same is true when using white vinegar instead of dish soap; however, this has a more pleasing smell than vinegar does and will not leave behind any pungent odors in its wake like unscented acetone would for example.
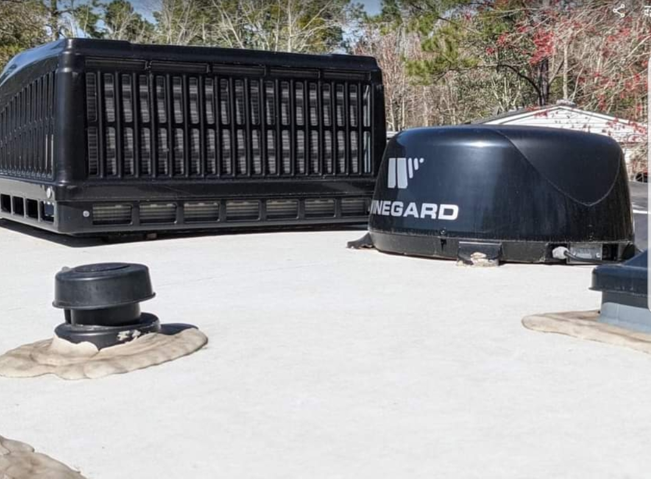
Clean the Rubber Roof in Sections
There is no need to use expensive cleaners, however, for the best results. Most rubber roofs have a very textured surface, so it is important to clean them by section or it will be difficult to reach all of the dirt that accumulates on the roof over time. For example, if you want to cover a 24-foot long roof, work from one end going back and forth over the entire area until finished rather than trying to clean across the width in one direction at once.
Subscribe
Stay updated with our newsletter
The following is a list of items needed:
- Warm Water Hose
- Scrub Brush Or Pad
- Buckets for transporting and mixing chemicals
- Pressure washer
- Chemical Solution
- Rubber gloves
A warm water hose is necessary to thoroughly and quickly clean the roof of your RV.
A sponge won't work for this job since there's no way to properly clean an area if it can't even get wet, so use a scrub brush instead. This must be something with nylon bristles rather than natural ones such as boars hair because natural materials would dissolve under harsh acidic chemical solutions used in cleaning rv rubber roof, which we will discuss below
You will need some type of bucket, preferably a five gallon one, that you can use to transport some water and safe cleaning solution in. You will also need a bucket or some type of container to mix the two together in before applying them.
This is optional though recommended because it can do most of the work for you if you get a rather strong one. However, this article will focus on doing it manually since not everyone has access to such equipment at their homes or RVs. If you do however have a pressure washer, your life will be much easier.
The right chemical solution for cleaning a rv rubber roof will be either store bought, vinegar or lemon juice, depending on what you have available. These can get rid of any harmful bacteria that may have been left on the surface. In addition, vinegar is more commonly used for this type of work if it can't be helped because it doesn't contain any corrosive chemicals.
Last but not least of all is that you will need rubber gloves to protect yourself from any potentially harmful chemicals that may happen to settle on your hands while cleaning with them. You surely don't want this stuff getting into contact with your skin. Gloves were made to protect you, so use them!
Instructions on how to clean rv rubber roof
- For ease of access, park your RV under a covered area that will protect it from the Sun's UV rays for at most half an hour (depending on the intensity of the Sun).
- Then get your gloves and five gallon bucket ready by pouring some cleaner into it, filling up to half the volume; This is usually about 3 gallons. You may want to make sure there are no kids or pets running around while doing this.
- Remove any old sealant if necessary using an existing product like Goof Off, but please be careful while using this stuff because it can actually dissolve some coatings on rubber roofs which will then expose holes and allow leaks. Put on your gloves and use a small brush to work it in for about 15 minutes, then scrub with a coarse pad.
- Mix the cleaner and paint thinner until they turn white (about 20:1) and pour into the bucket
- Clean off any residue using a wet rag or towel and let dry for 30 minutes or so before applying new adhesive; This will prevent the formation of bubbles during application.
- Apply 3M Rubber Roof Adhesive #08984 according to instructions on its label by pouring it over the surface like syrup (to make sure every inch is covered).
- Use a squeegee to brush the adhesive around in circles, which will push out any bubbles and ridges in the process. Do not press down too hard on the squeegee or else you might create more bubbles!
- Once you are done applying all of the adhesive, wait about 45 minutes for it to cure before getting back onto your roof with your ladder.
- Apply roof coating directly over each spot where there are existing blisters, but avoid creating new ones by being careful when walking around on your roof.
- Leave the ladder and screwdrivers and bucket and squeegee up there so you can keep applying more roof coating as soon as the first coat dries.
- Use a small brush to paint around any screws or bolts on your roof so they stay nice and clean. If needed, use an old toothbrush for this task.
- Clean the roof with water! When it's slightly damp (not wet), put on rubber gloves and rub all of those stubborn stains away using a soft bristle brush. Remember to rinse out your rag rather than trying to wipe it off along the rubber because that will leave behind smudges everywhere!
- After your last step and after waiting for at least 24 hours (or preferably longer) for the coating to completely dry, apply a second coat of rubber roof coating like you did with the first one.
- This step is crucial: To ensure that the seal on your roof lasts as long as possible, let it cure for at least 14 days.
- You can paint around screws or bolts on your roof using a small brush if needed. If needed, use an old toothbrush for this task.
- Always clean the roof with water! When it's slightly damp (not wet), put on rubber gloves and rub all of those stubborn stains away using a soft bristle brush. Remember to rinse out your rag rather than trying to wipe it off along the rubber because that will leave behind a dirty film.
- Give your rubber roof a full day in the sun to dry out before you can drive your car on it again. If you're going on a long trip, have someone walk around your roof and double check for any areas that may need a second coat of sealant or touchups.
- Don't overload your roof with too many accessories! This will put unnecessary strain on your rubber membrane and it will wear through quicker over time.
- If you do accidentally puncture a hole in your rubber roof, either from a fallen branch or an errant baseball bat, don't be discouraged! Repair kits are available at most camping stores and they're fairly easy to use provided that there's no major damage to the roof.
Chemical Solutions
The best thing to use for cleaning your roof is a cleaning solution that is specifically made for rubber roofs. These products usually have a very long name, something like "rubber roof cleaner" or "durable rubber roof bath." They are typically available in most garage and hardware stores that sell commercial cleaning products.
To use this type of product:- Mix it with water in a bucket.
- Next, transfer the mixture to a spray bottle and apply evenly over different sections of the rv roof.
- Give it a few minutes to soak into the rubber, then scrub it away using a plastic bristle broom.
- Rinse the roof with a warm water hose.
- Take your time and be thorough as you wash different sections of your rubber roof.
- Repeat as needed until all of the soap residue is gone.
- When you're done, spray your roof once more with a warm water hose to remove any excess soap or dirt that remains.
- If there are stubborn stains you can't remove, try using a different type of cleaner.
- A mixture of vinegar and baking soda can help remove some types of stains as well as prevent new ones from seeping through the rubber roof's surface. Combine equal parts white vinegar and baking soda in a large bucket and mix them together until you create a paste-like consistency. Apply it to your rubber roof with a scrub brush and wash away after 10 minutes. Though slightly more time consuming than other methods, this method should do the trick without harming your rv's rubber roofing material.
- If those products don't do the trick, there are other chemicals that can help make cleaning easier. You could try any product containing d-Limonene or Citra Solv solvents for removing scum from surfaces. These solvents work by breaking down stains and dirt instead of just pushing them around. They typically have an orange smell to them since they're made from citrus fruits, but it's not too overpowering compared to some other commercial cleaning products.
Conclusion
One important thing to remember when using commercial cleaners is that you must rinse off any cleaner residue before applying a protectant coating to your rubber roof. If you do not rinse away all traces of cleaner from your roof, it can cause problems when you put on sealant or wax. Using all-purpose cleaners is one way to get your rubber roof clean and looking like new, but there are a couple other things you can try if you don't want to use a cleaner. One method, which is probably the cheapest option in terms of water and electricity costs, is to wash your roof by hand with a rag or sponge and warm water. You'll still need some kind cleaning solution for this to work properly, so add about two teaspoons of dishwashing liquid (the kind without any added color) to a bucket full of warm water. Sponge the entire surface of the rv rubber roof with your mixture, working in small sections at a time.
The Olympic Hot Springs
Visit The Olympic Hot Springs. It has so much to offer. Here i go over some of the things to expect when you visit.
About Author:

Hi, I'm Kevin Pommells, a lover of camping and the great outdoors as everyone says nowadays. I'm also a passionate soccer fan and the proud owner of CamperRules.com, a website dedicated to helping campers and outdoor enthusiasts make the most of their adventures. With years of experience exploring the wilderness and a deep love for the sport of soccer, I'm always looking for new ways to combine my two passions and share my knowledge with others. Follow me for tips, tricks, and insights on all things camping and outdoor recreation.
Follow Me @ Twitter | Facebook | KevinPommells.com